With another year in the books, the Optix team couldn’t be more proud of everything we’ve accomplished over the past 365 days.
We created a brand new way to run your business with Automations, launched an exceptional new Account Panel to increase oversight, and made it easier to manage guests and packages with Visitor Management. Plus, we launched a fresh new logo.
All of the work we do only matters because of you. We couldn’t do it without the appreciation and support from all of you, our incredible clients, who are changing how the world works one day at a time.
With that, we wanted to take a moment to reflect on the 20 features you loved the most in the year 2024 – starting with January.
Jan: Allow users to pay with direct banking via Stripe
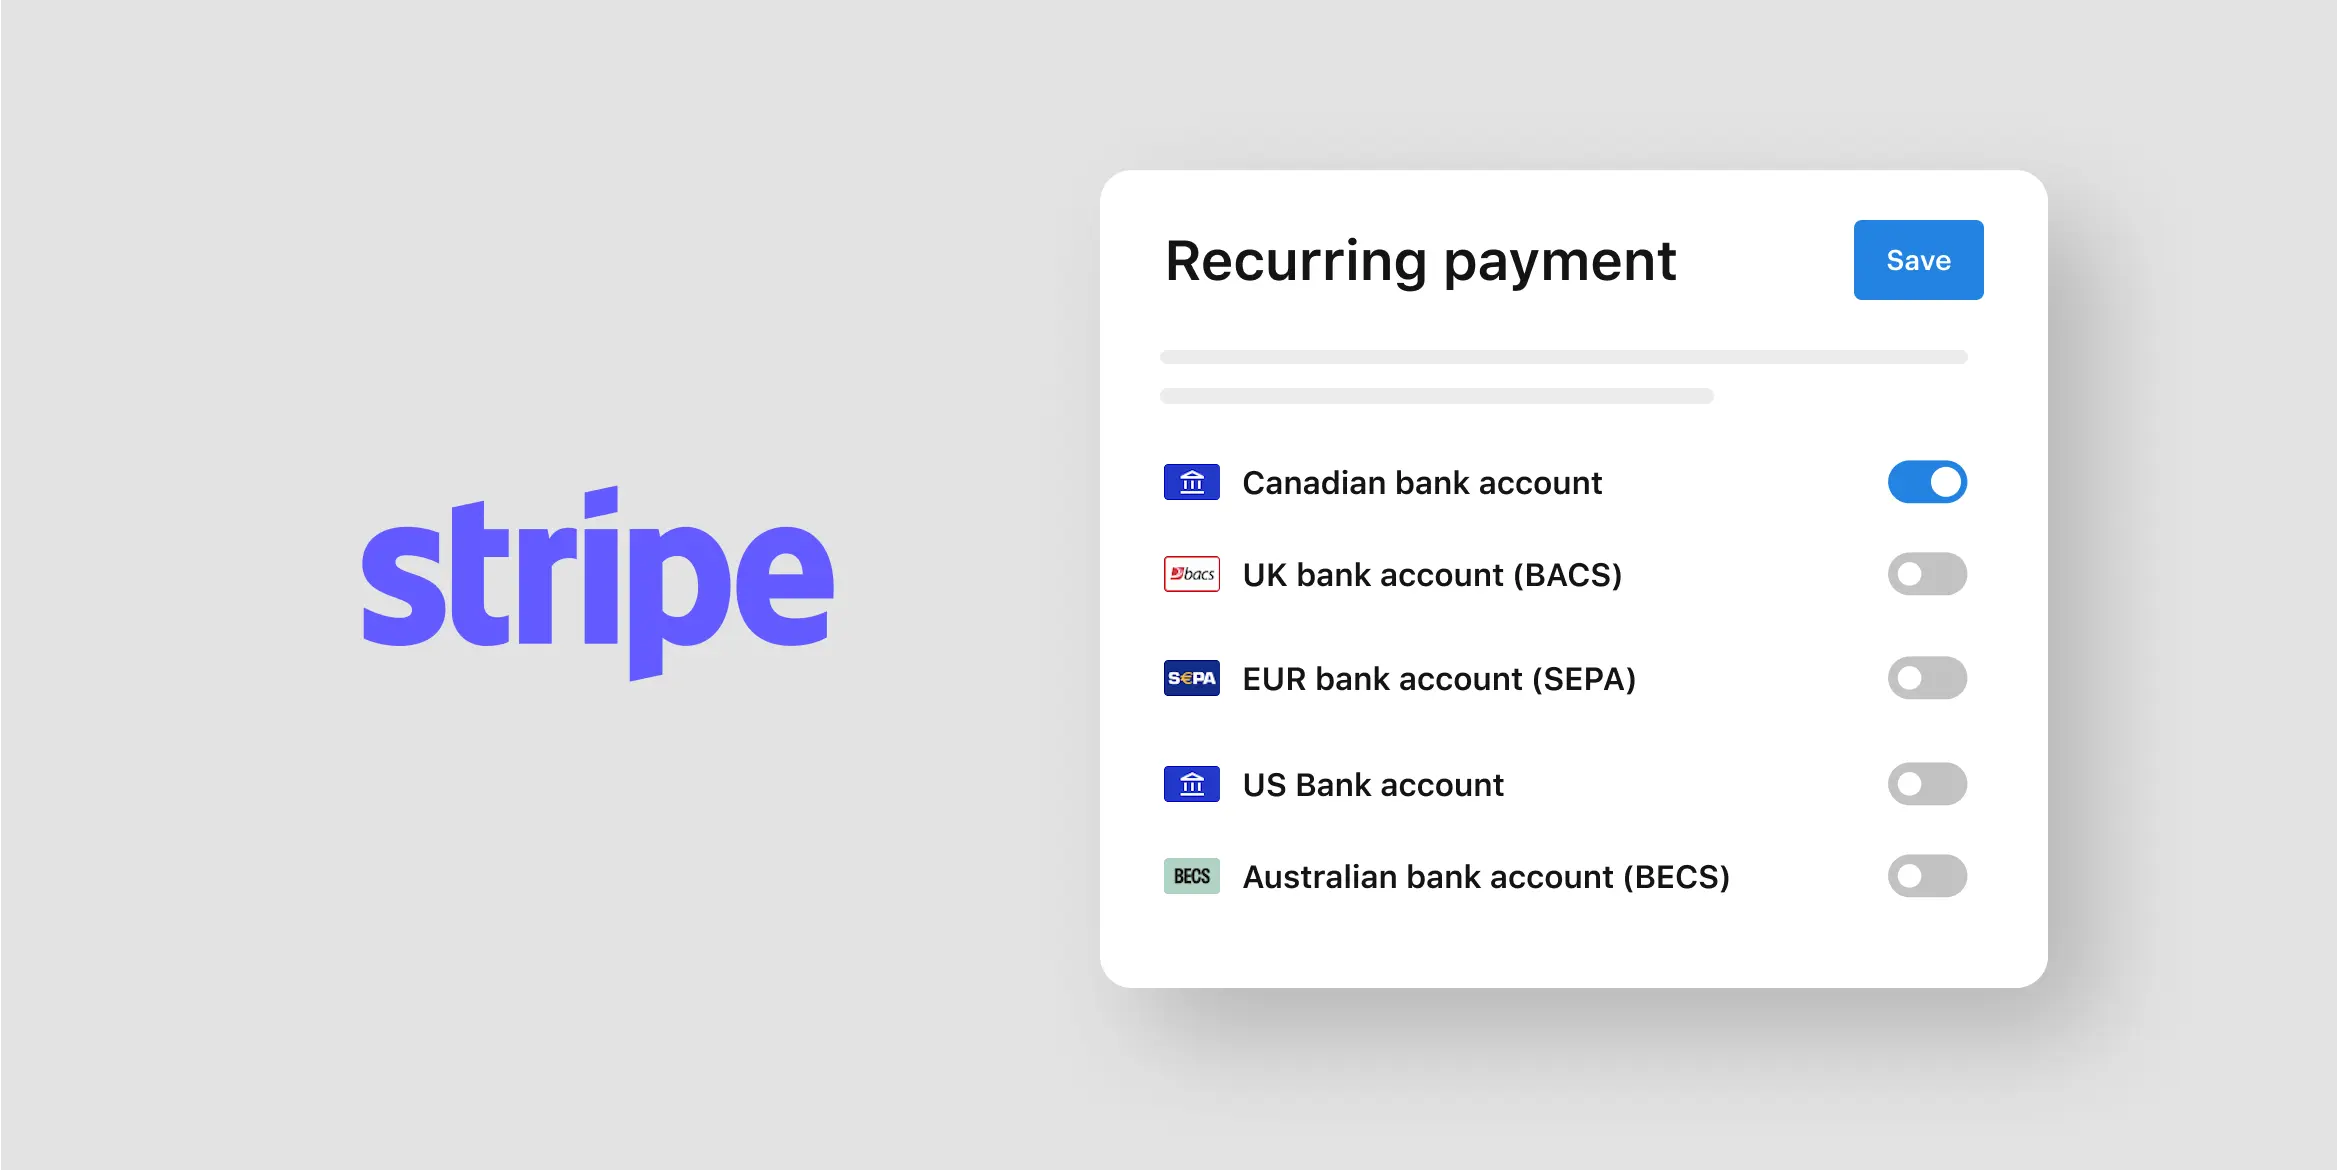
We kicked off the new year with a highly requested feature that introduced the ability to accept direct bank transfers via Stripe, marking a major upgrade to financial processes and member experiences. With this enhancement to Optix’s Stripe integration, members are no longer restricted to storing only a credit card within the Optix app.
Check out the FAQ to learn more about how to accept direct bank transfers with Optix.
Jan: Introducing Visitor Management
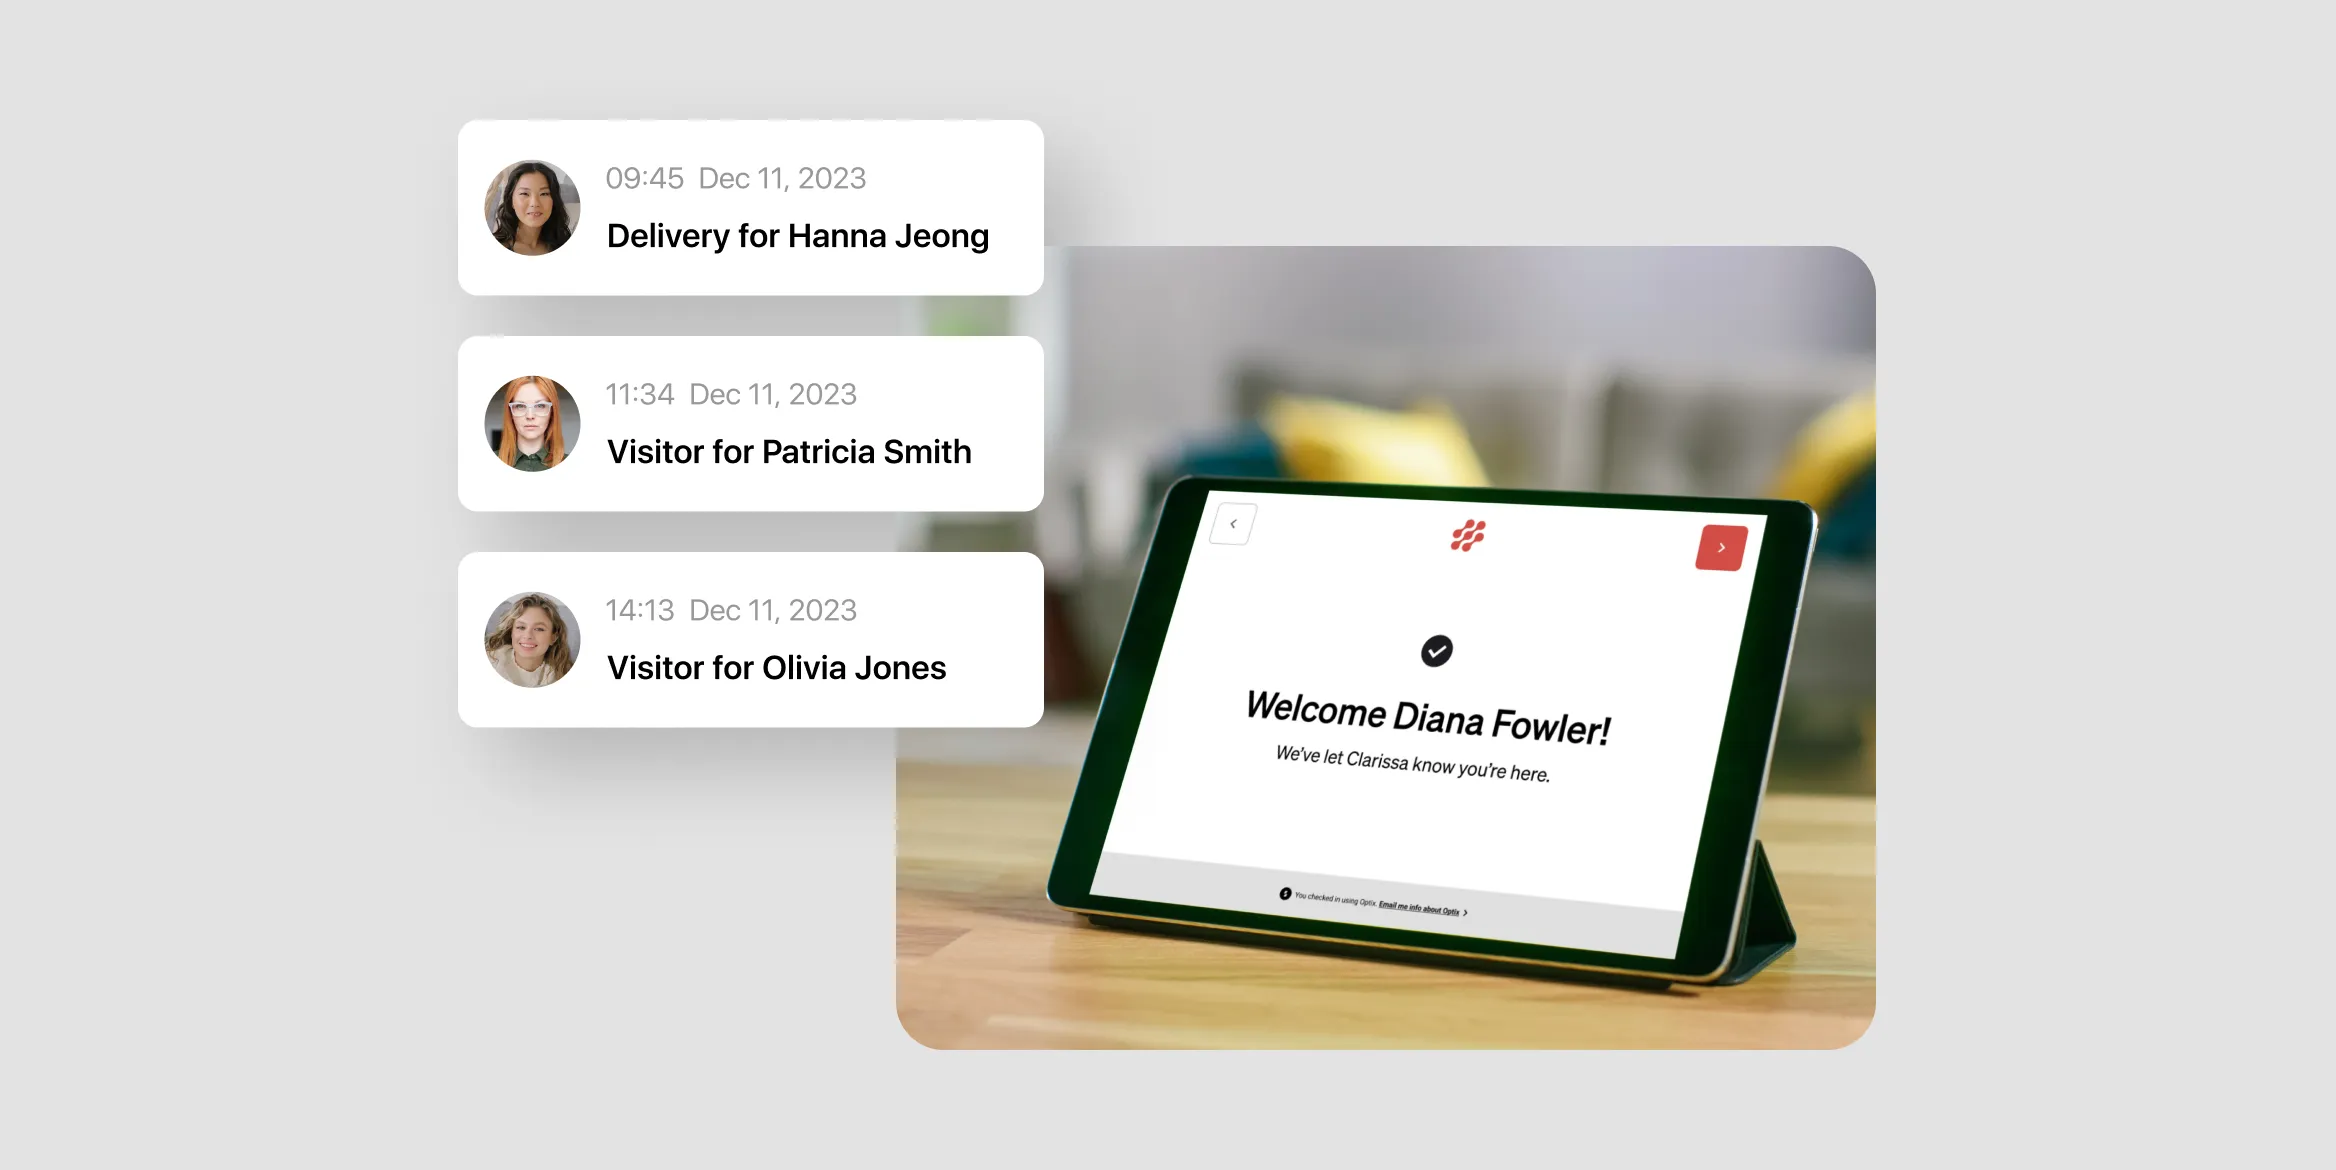
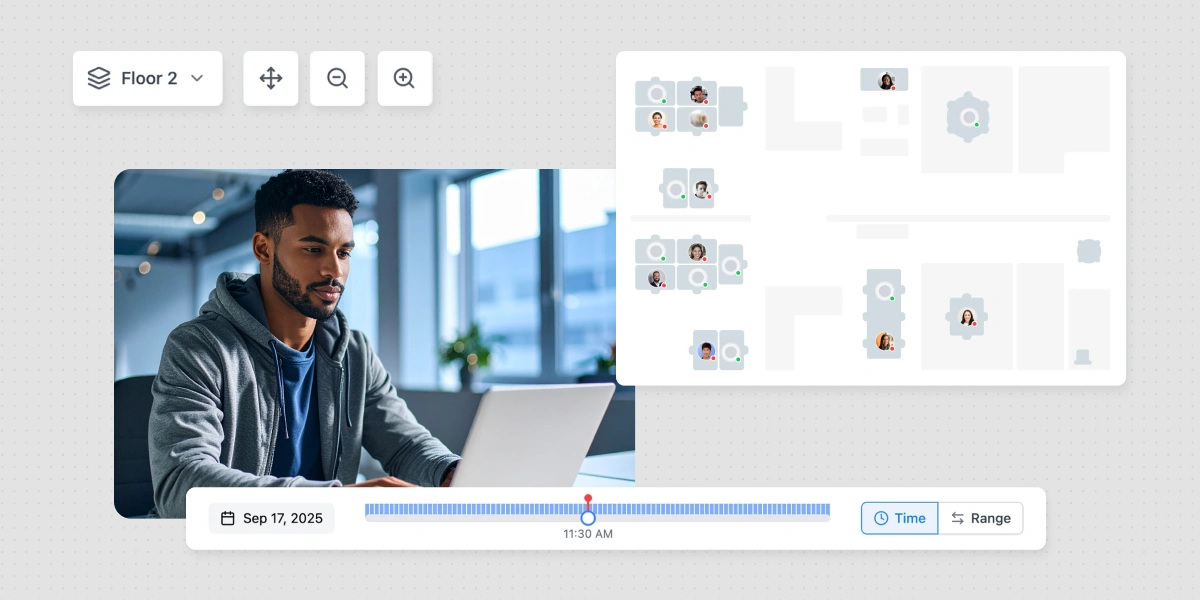
We also got 2024 off to a strong start with the all new Visitor Management app! The app syncs from your admin dashboard to an external device, such as a tablet or phone, where guests can enter their personal information and check-in upon visiting your space. In doing so, you can create an automated visitor experience that will leave a lasting impression on your visitors.
Check out this FAQ to learn more about how to set up Visitor Management for your organization.
Feb: Link and block resources
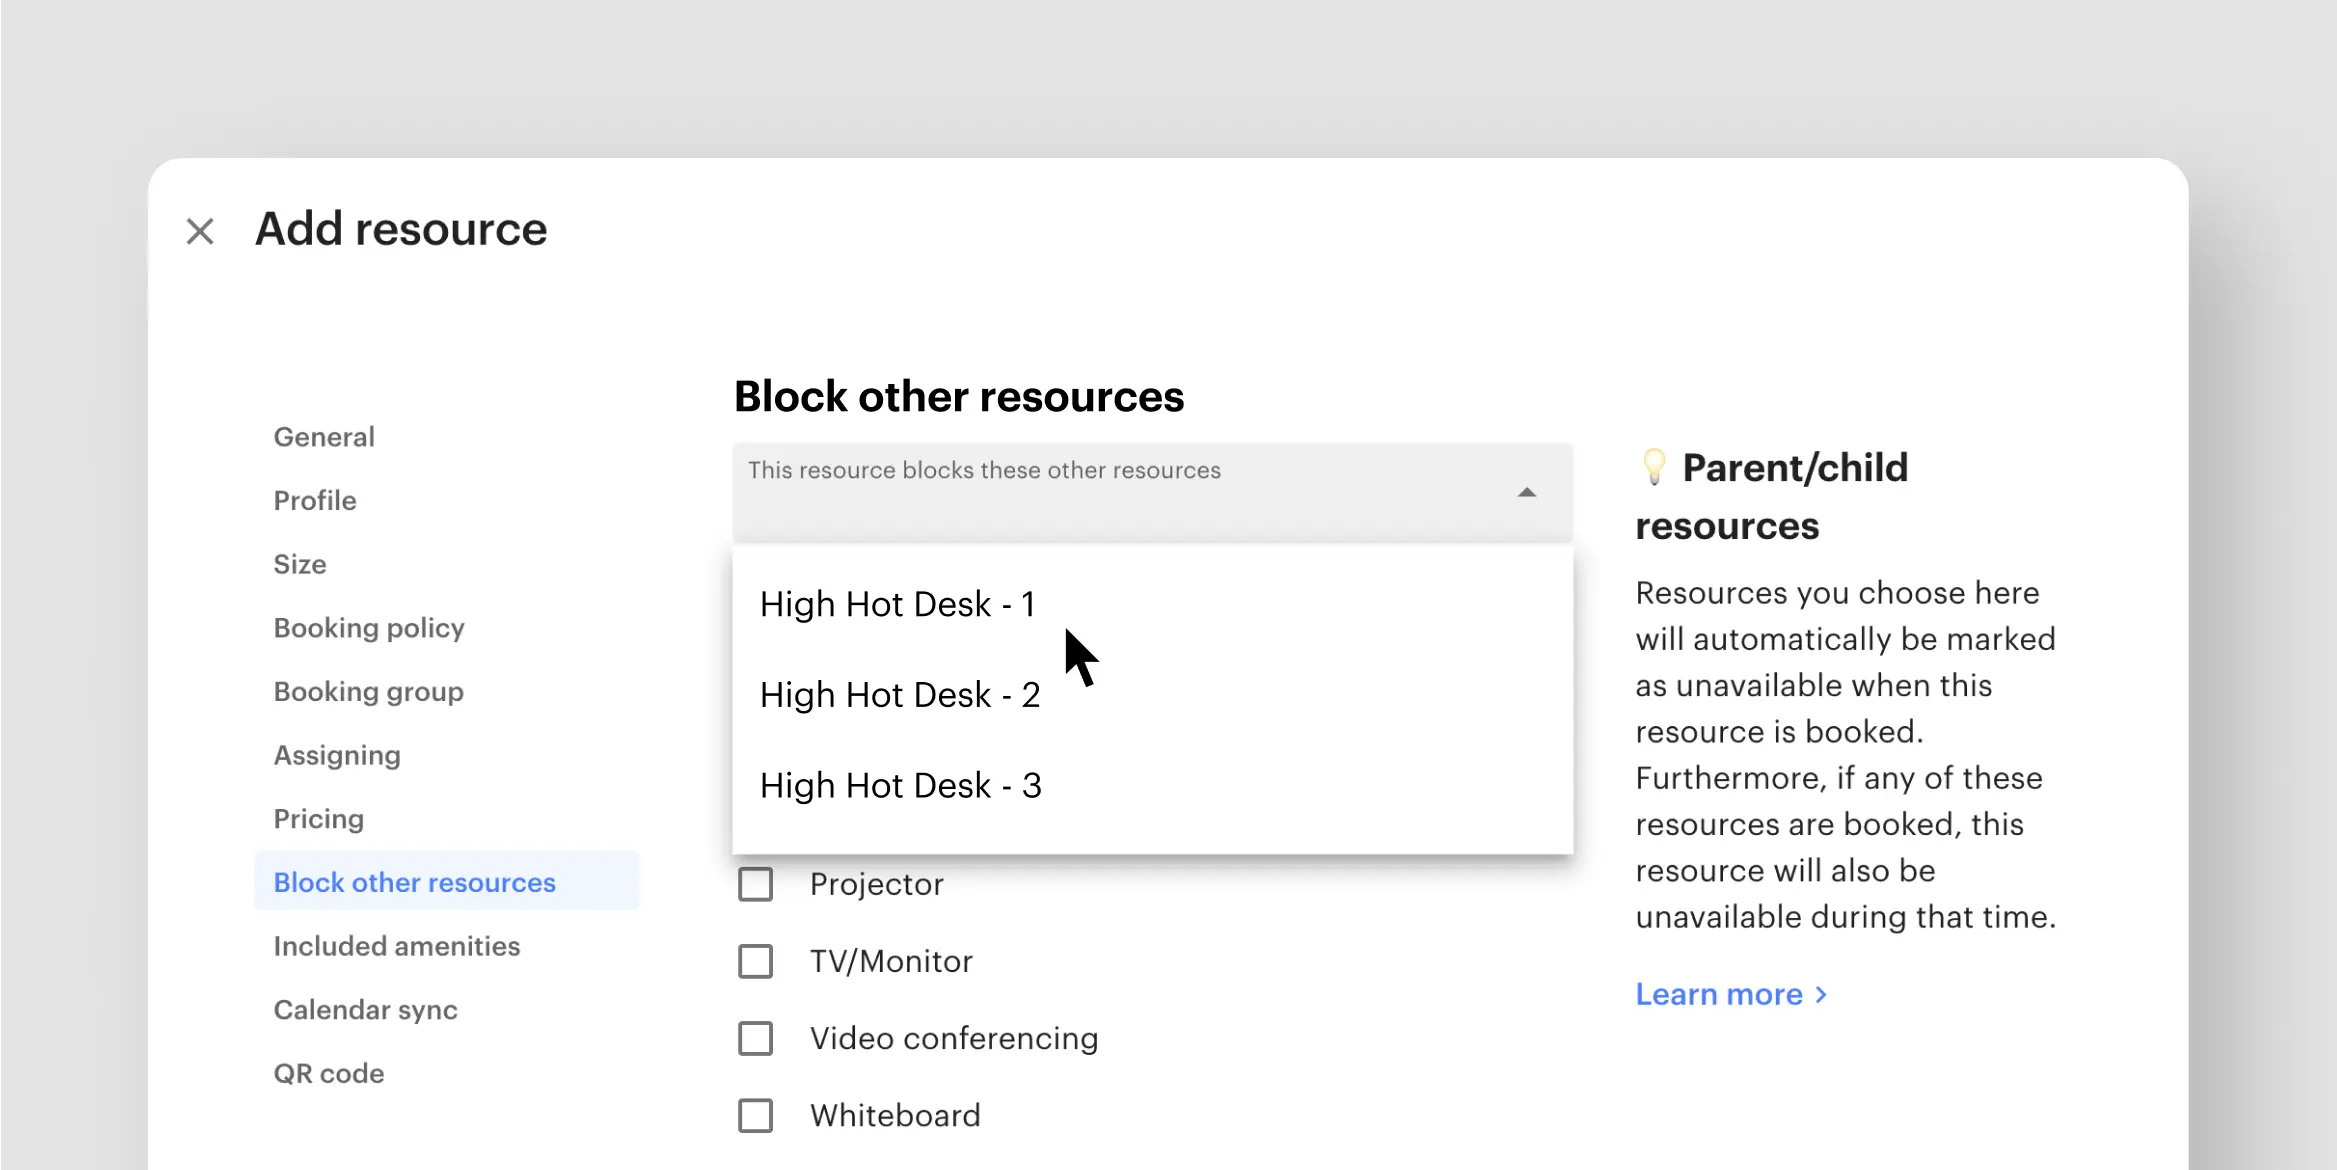
February brought the ability to link resources and designate them as either ‘parent’ or ‘child’. This powerful enhancement makes it so that if a ‘parent’ resource is booked, then ‘child’ resources associated with it will also become unavailable, allowing you to enjoy greater control and flexibility in managing your resources.
Check out this FAQ to learn how to assign resources as a ‘parent’ or ‘child’.
Feb: Introducing the Inquiry Web Widget
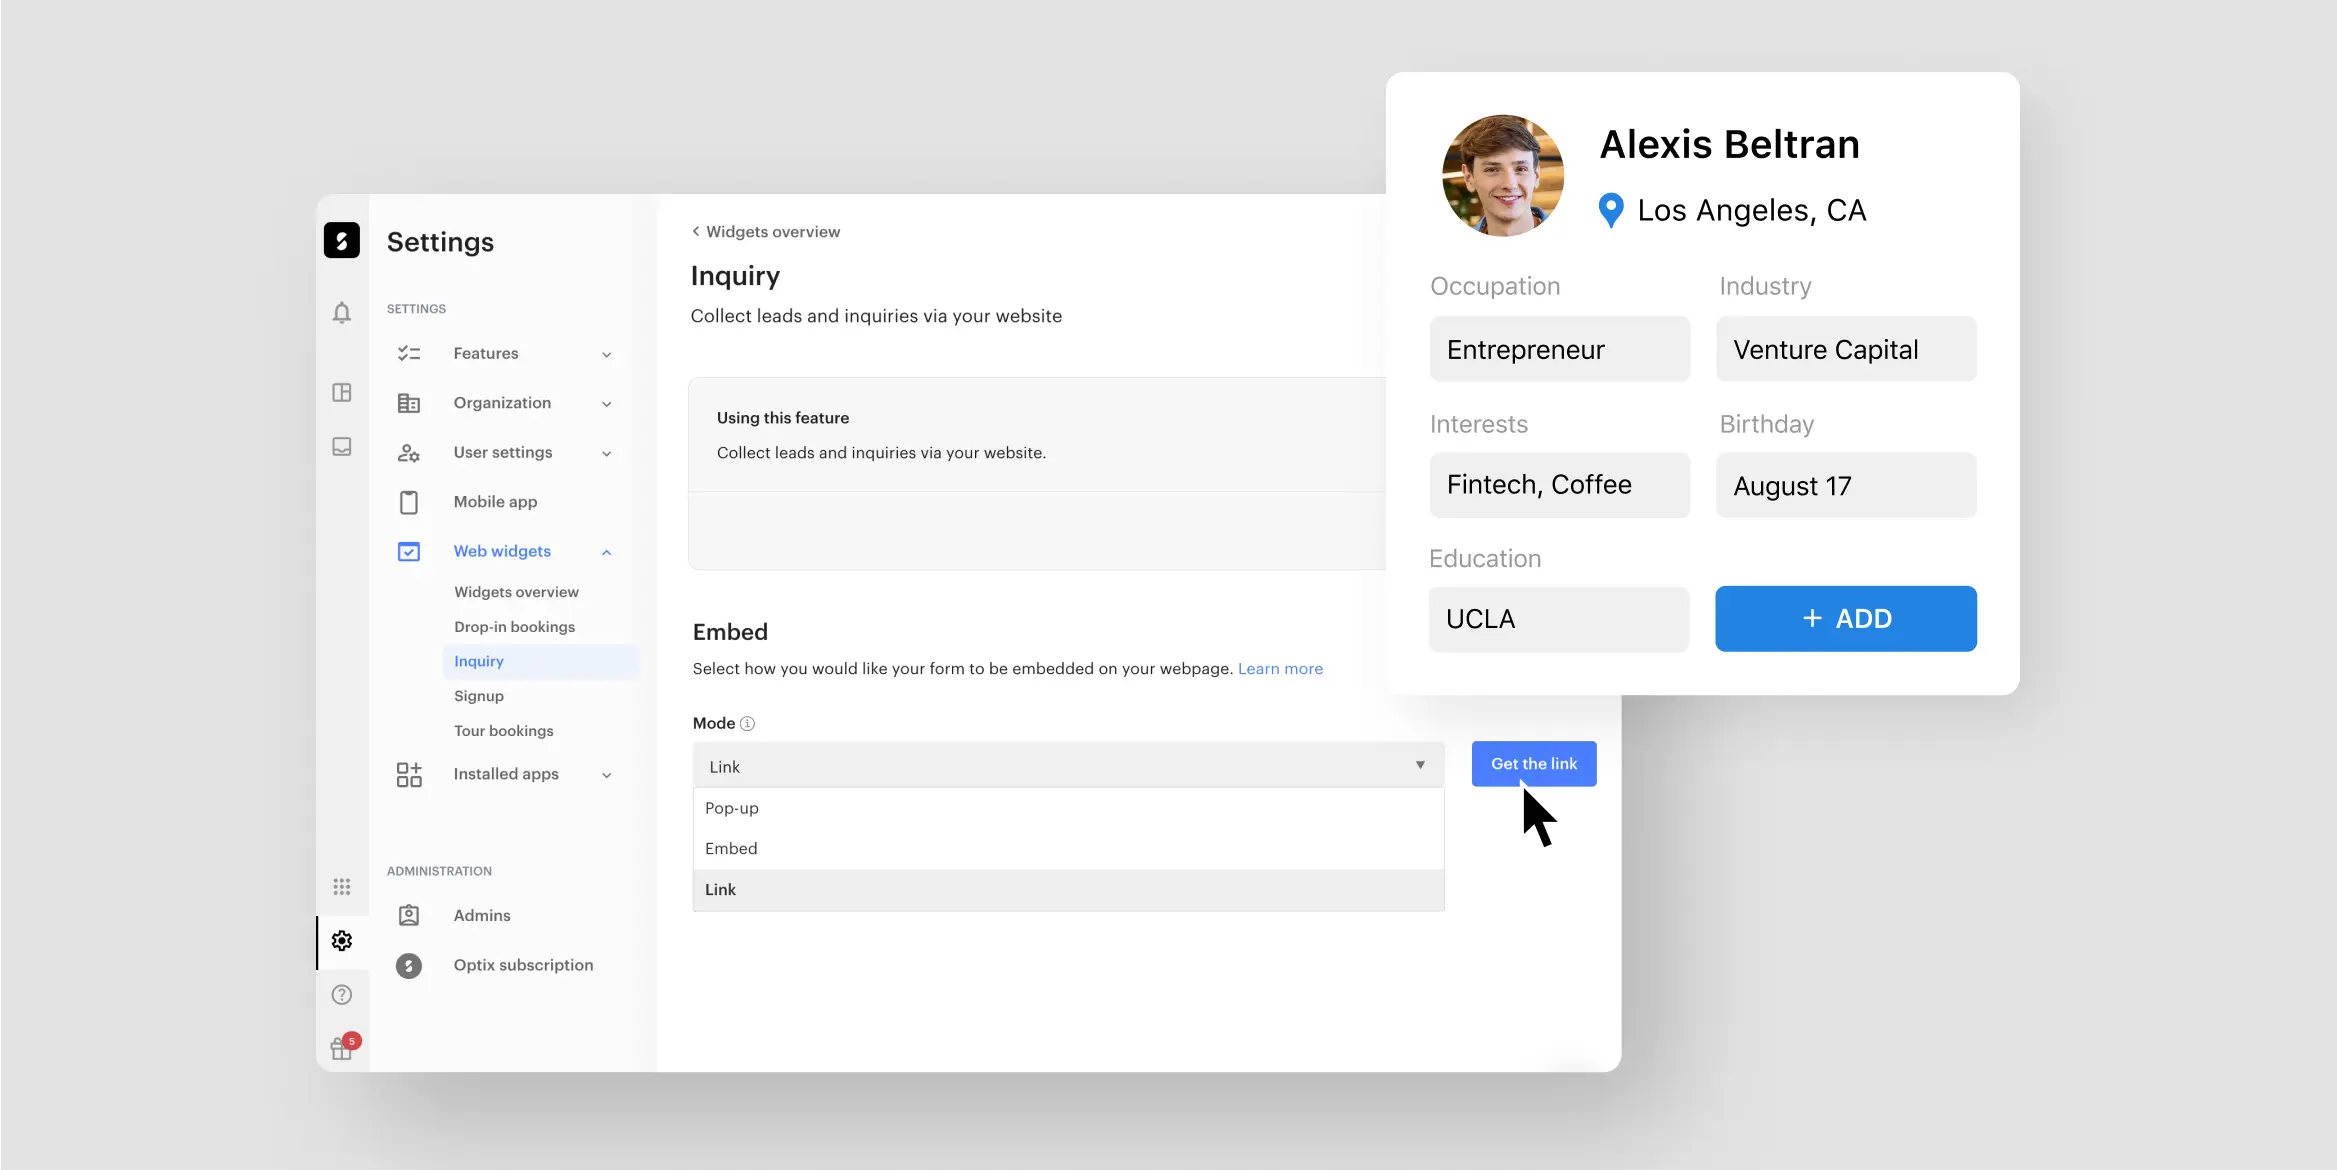
We also launched the Inquiry Web Widget in February, a brand new web widget that can be embedded directly on your website, no coding required. Collect custom information from leads, such as their organization, their interest in specific memberships, or anything that could help you determine if they would be a good fit for your space.
Check out this FAQ to learn how to turn your inquiries via the web widget into leads.
Feb: Add transaction fees to users’ invoices
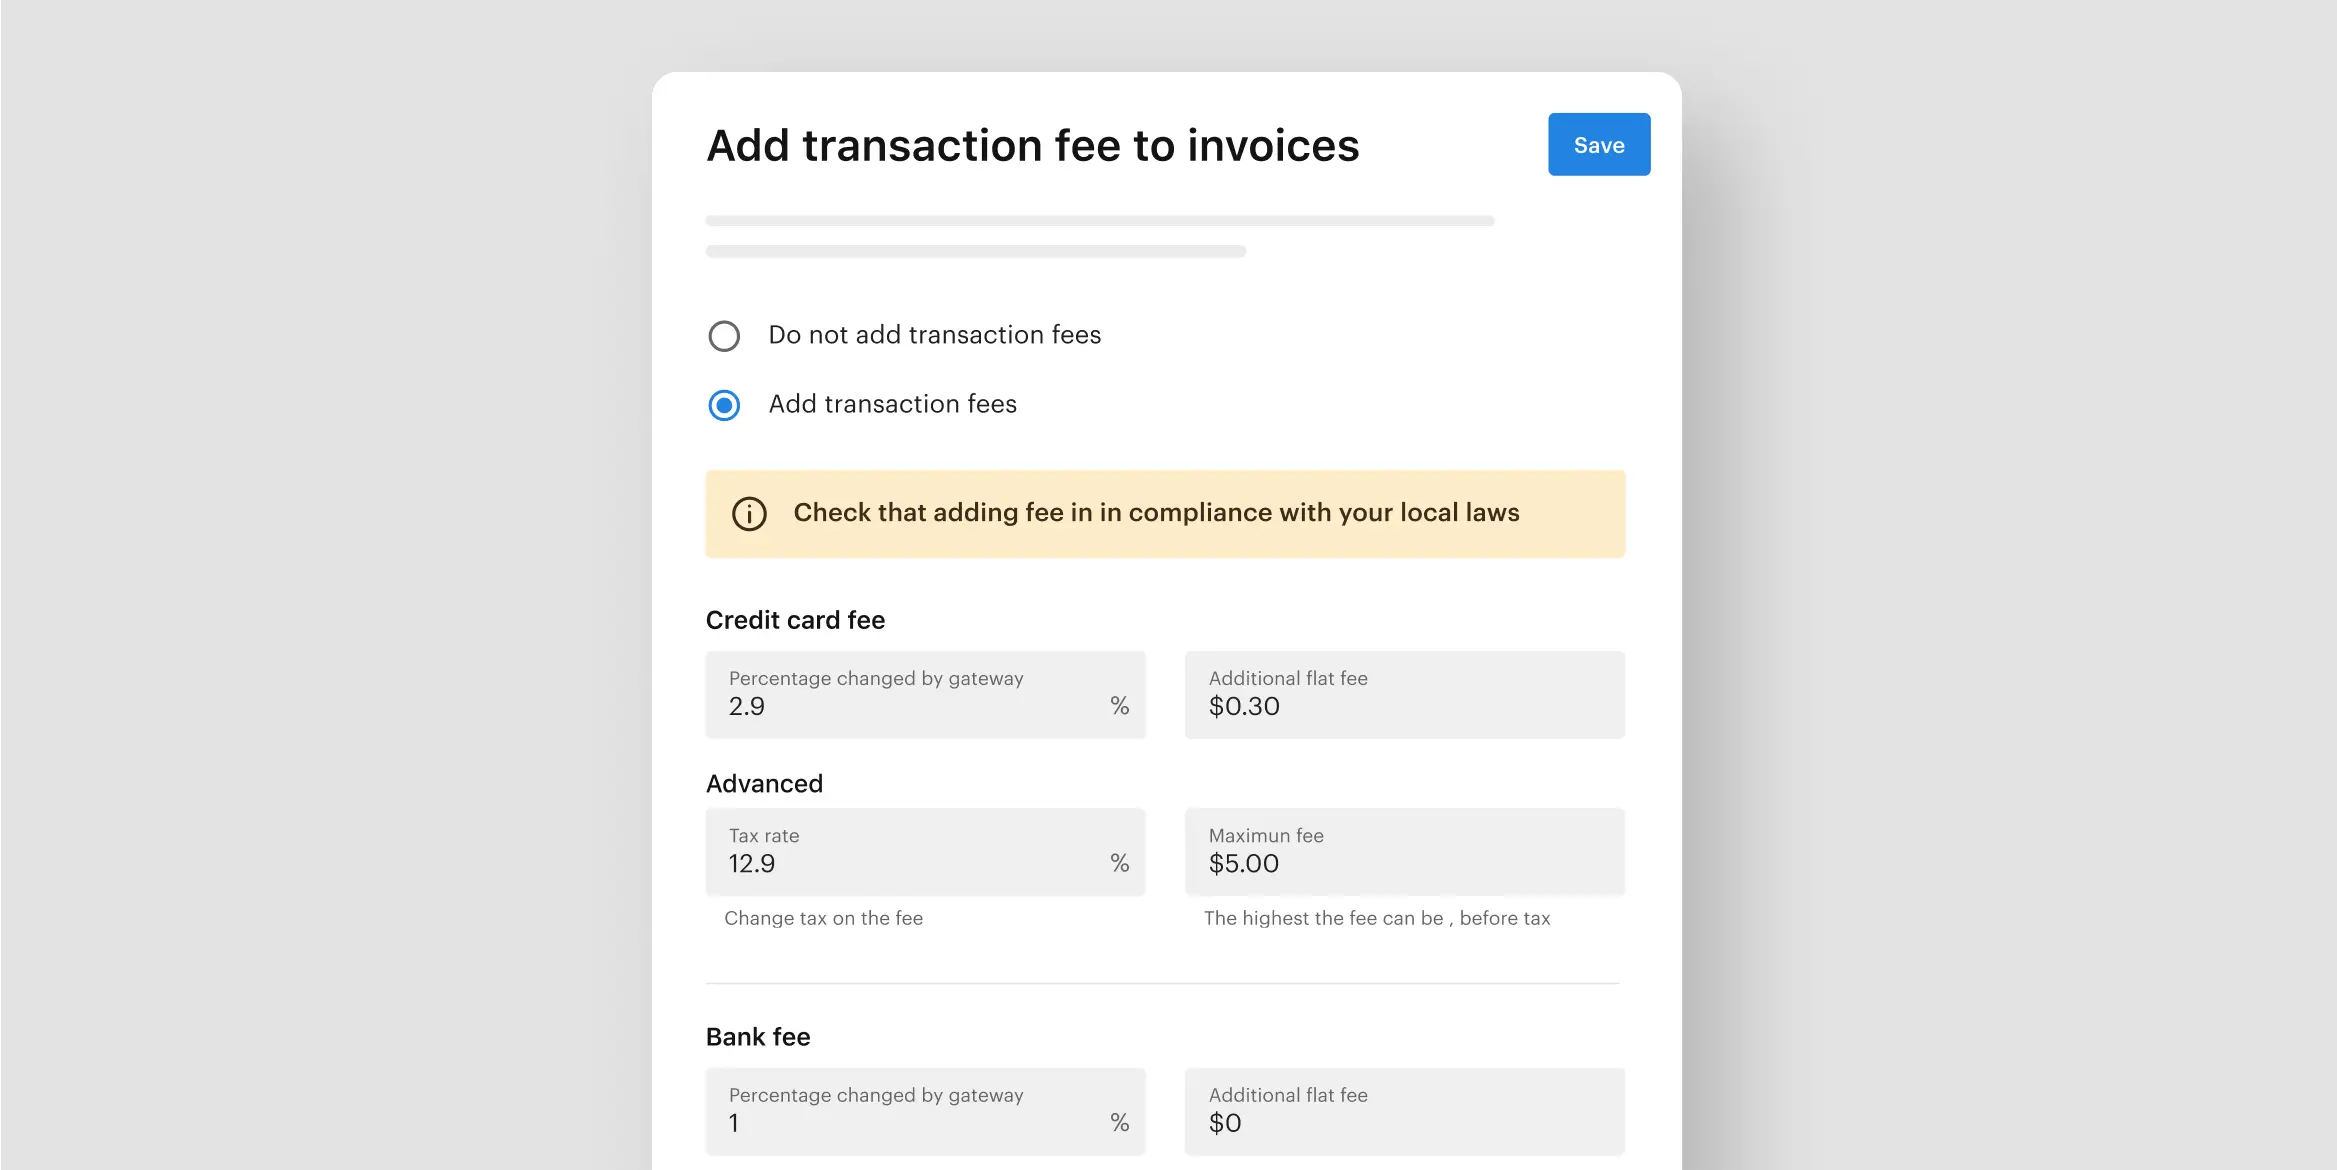
Finally in February, we launched one of our most requested features to date, the ability to add transaction fees to users’ invoices. You can specify the amount you want to charge users for each transaction, which will then appear under their invoices. By being able to pass those fees on to members, you can generate more revenue for your business.
Check out this FAQ to learn more about how to add transaction fees to invoices.
Mar: We launched a new Optix logo

The Optix logo hadn’t been updated in nearly eight years, but that all changed in March when we launched the brand new Optix logo. The update signified our evolution from supporting spaces to serving the people who run them, while continuing our commitment towards a flexible future.
Dive into the future with the all-new Optix logo.
Mar: Create tasks from anything within Optix
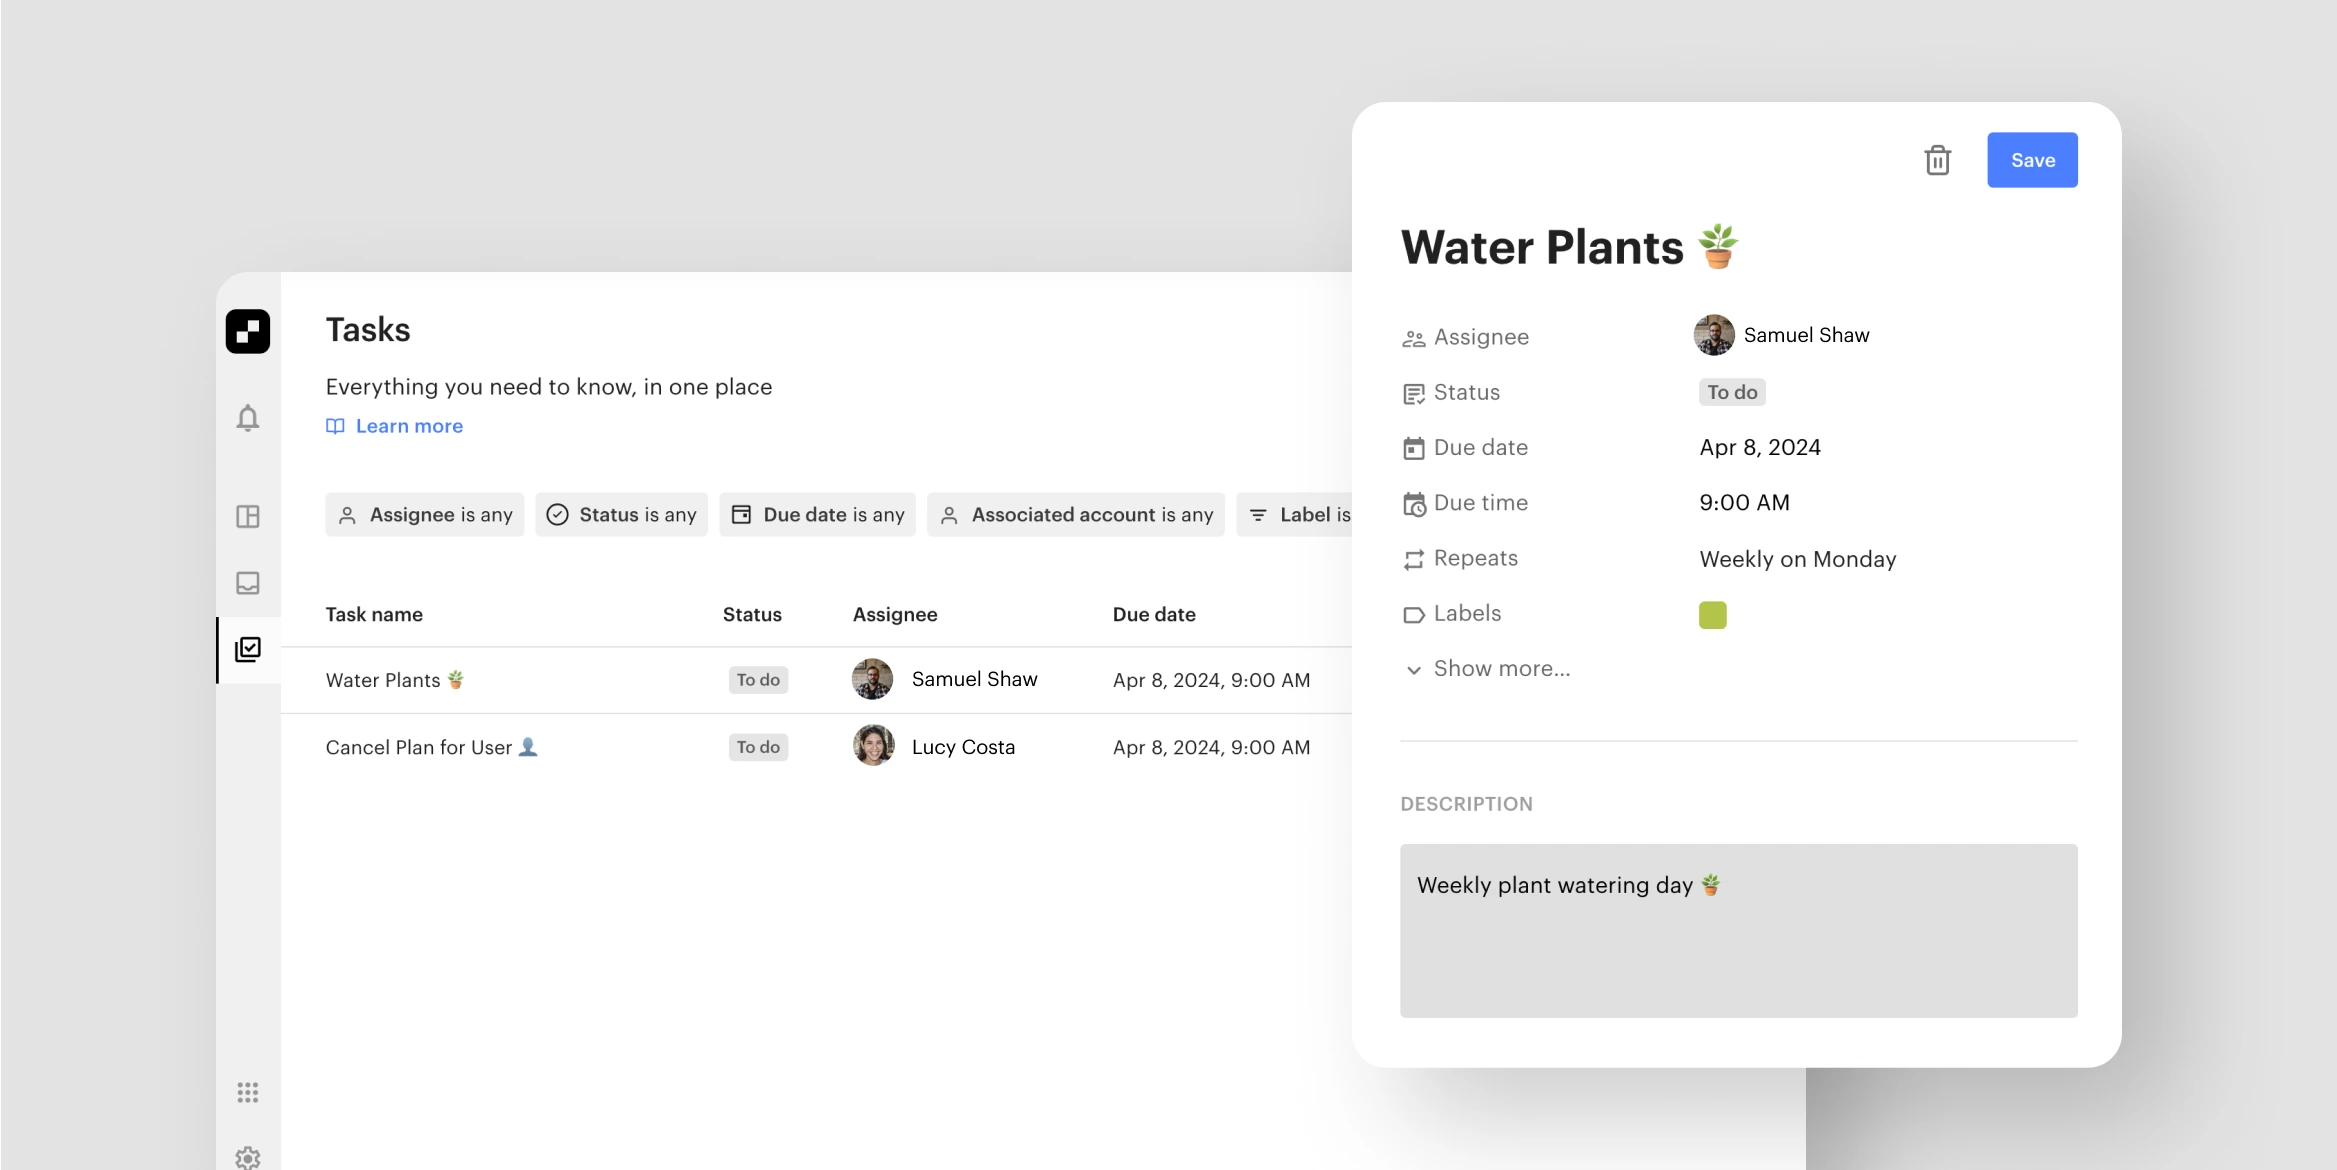
Task management is key to a thriving coworking space operation, and in March, we made it a lot easier to manage these tasks in Optix. With Tasks, you can create and assign tasks to yourself or any other admin in the organization to help stay organized and on track – whether you’re a community manager or an operator.
Check out this FAQ to learn how to create a task.
Apr: Manage your sales funnel with Account Types
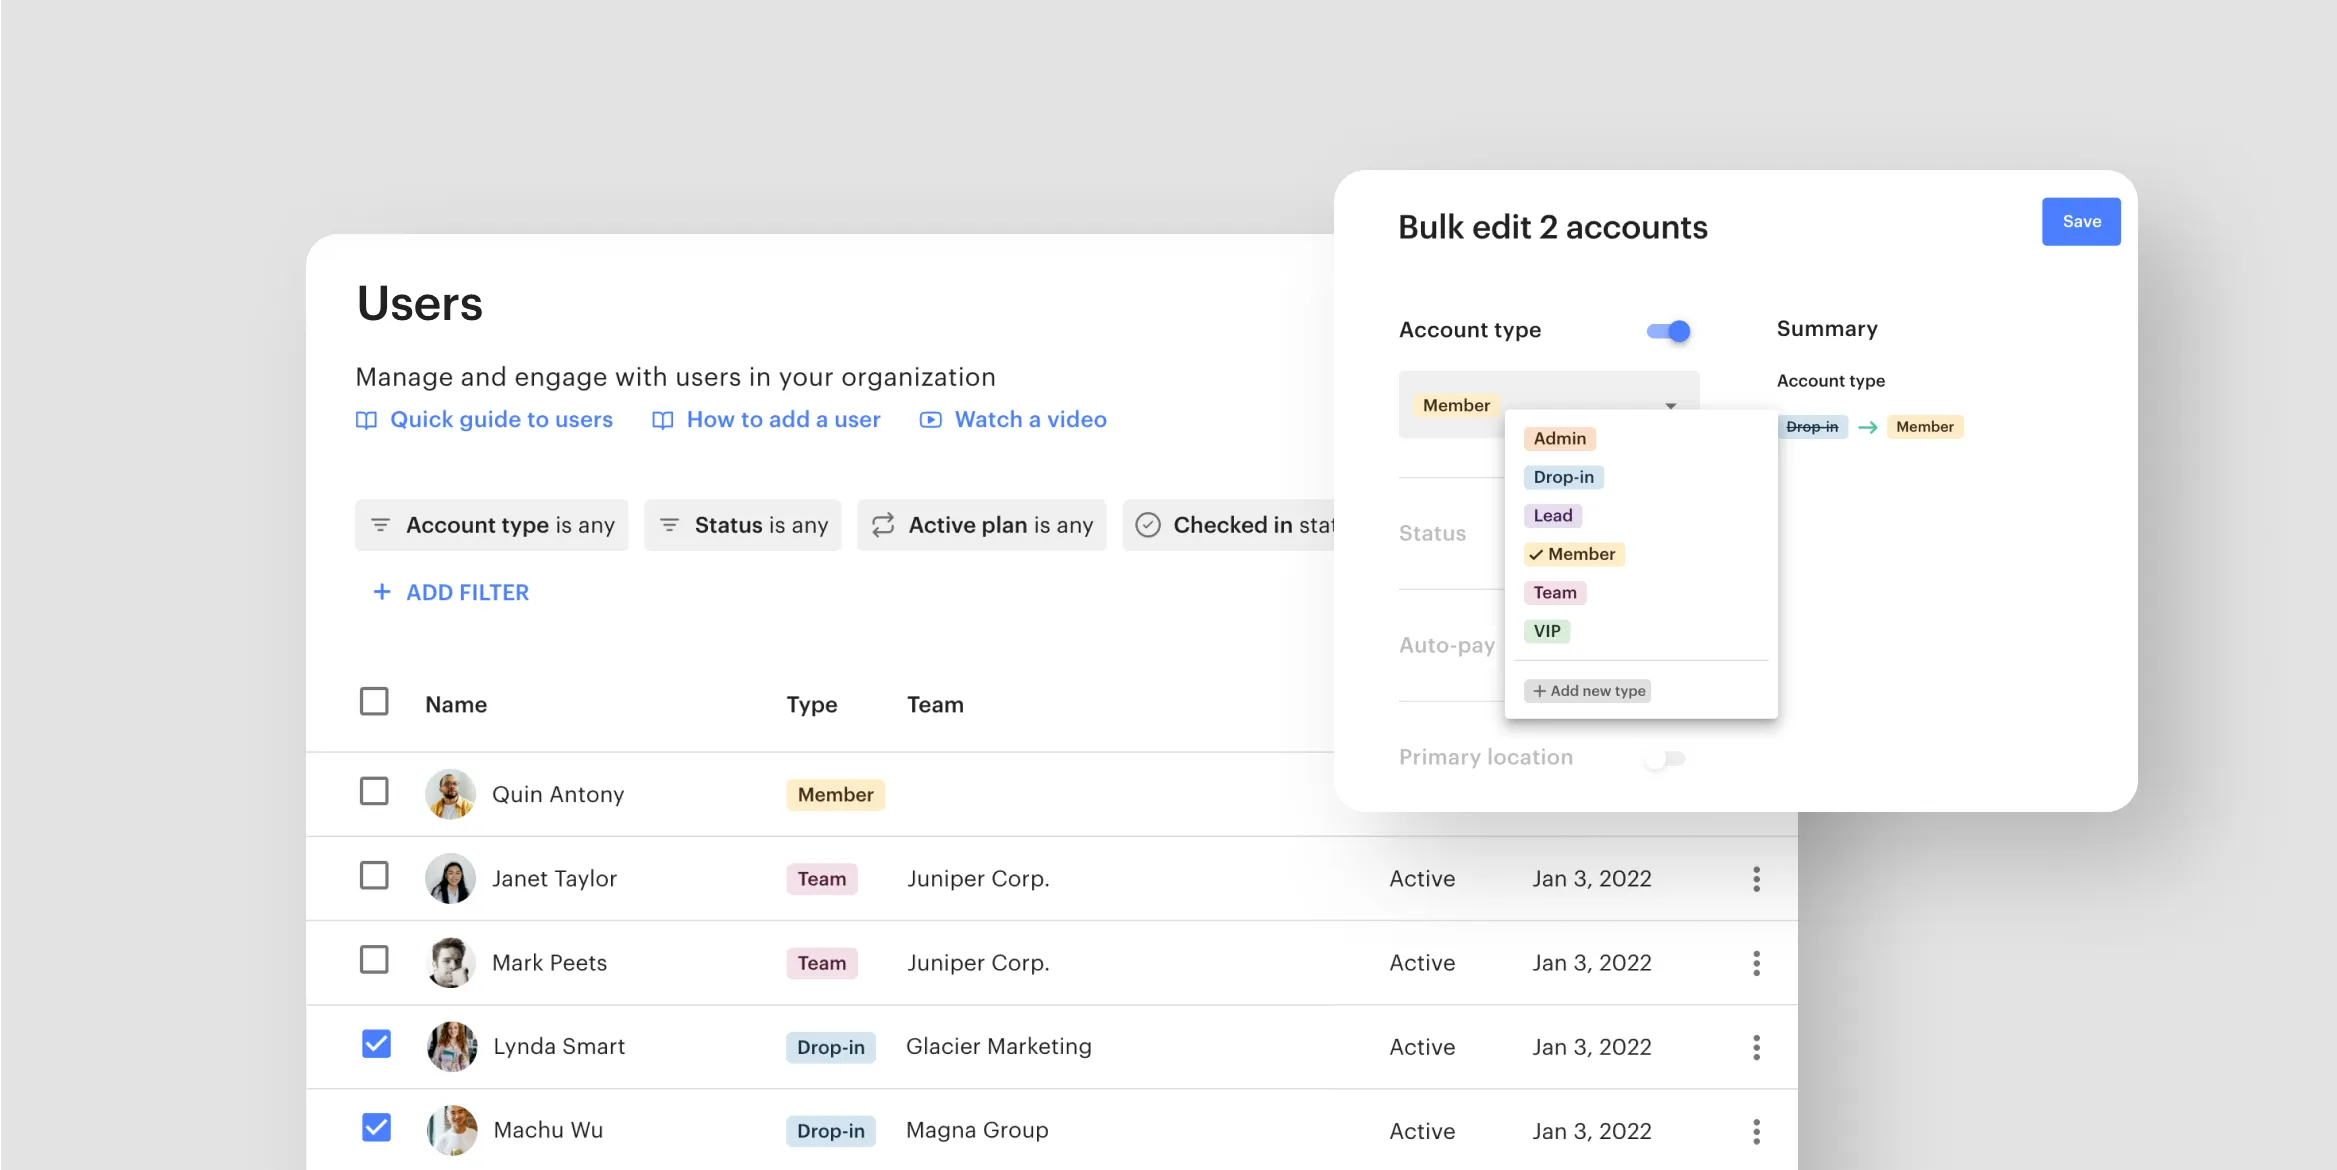
In April, we expanded the CRM capabilities of Optix with Account Types. This powerful feature enables you to organize users into different types based on membership, funnel status, or anything else you define! It opens up new possibilities for your business model, and enables you to create a personalized experience tailored to specific groups of users.
Check out this FAQ to learn how to create a user Account Type.
Apr: Make resources available to specific users only
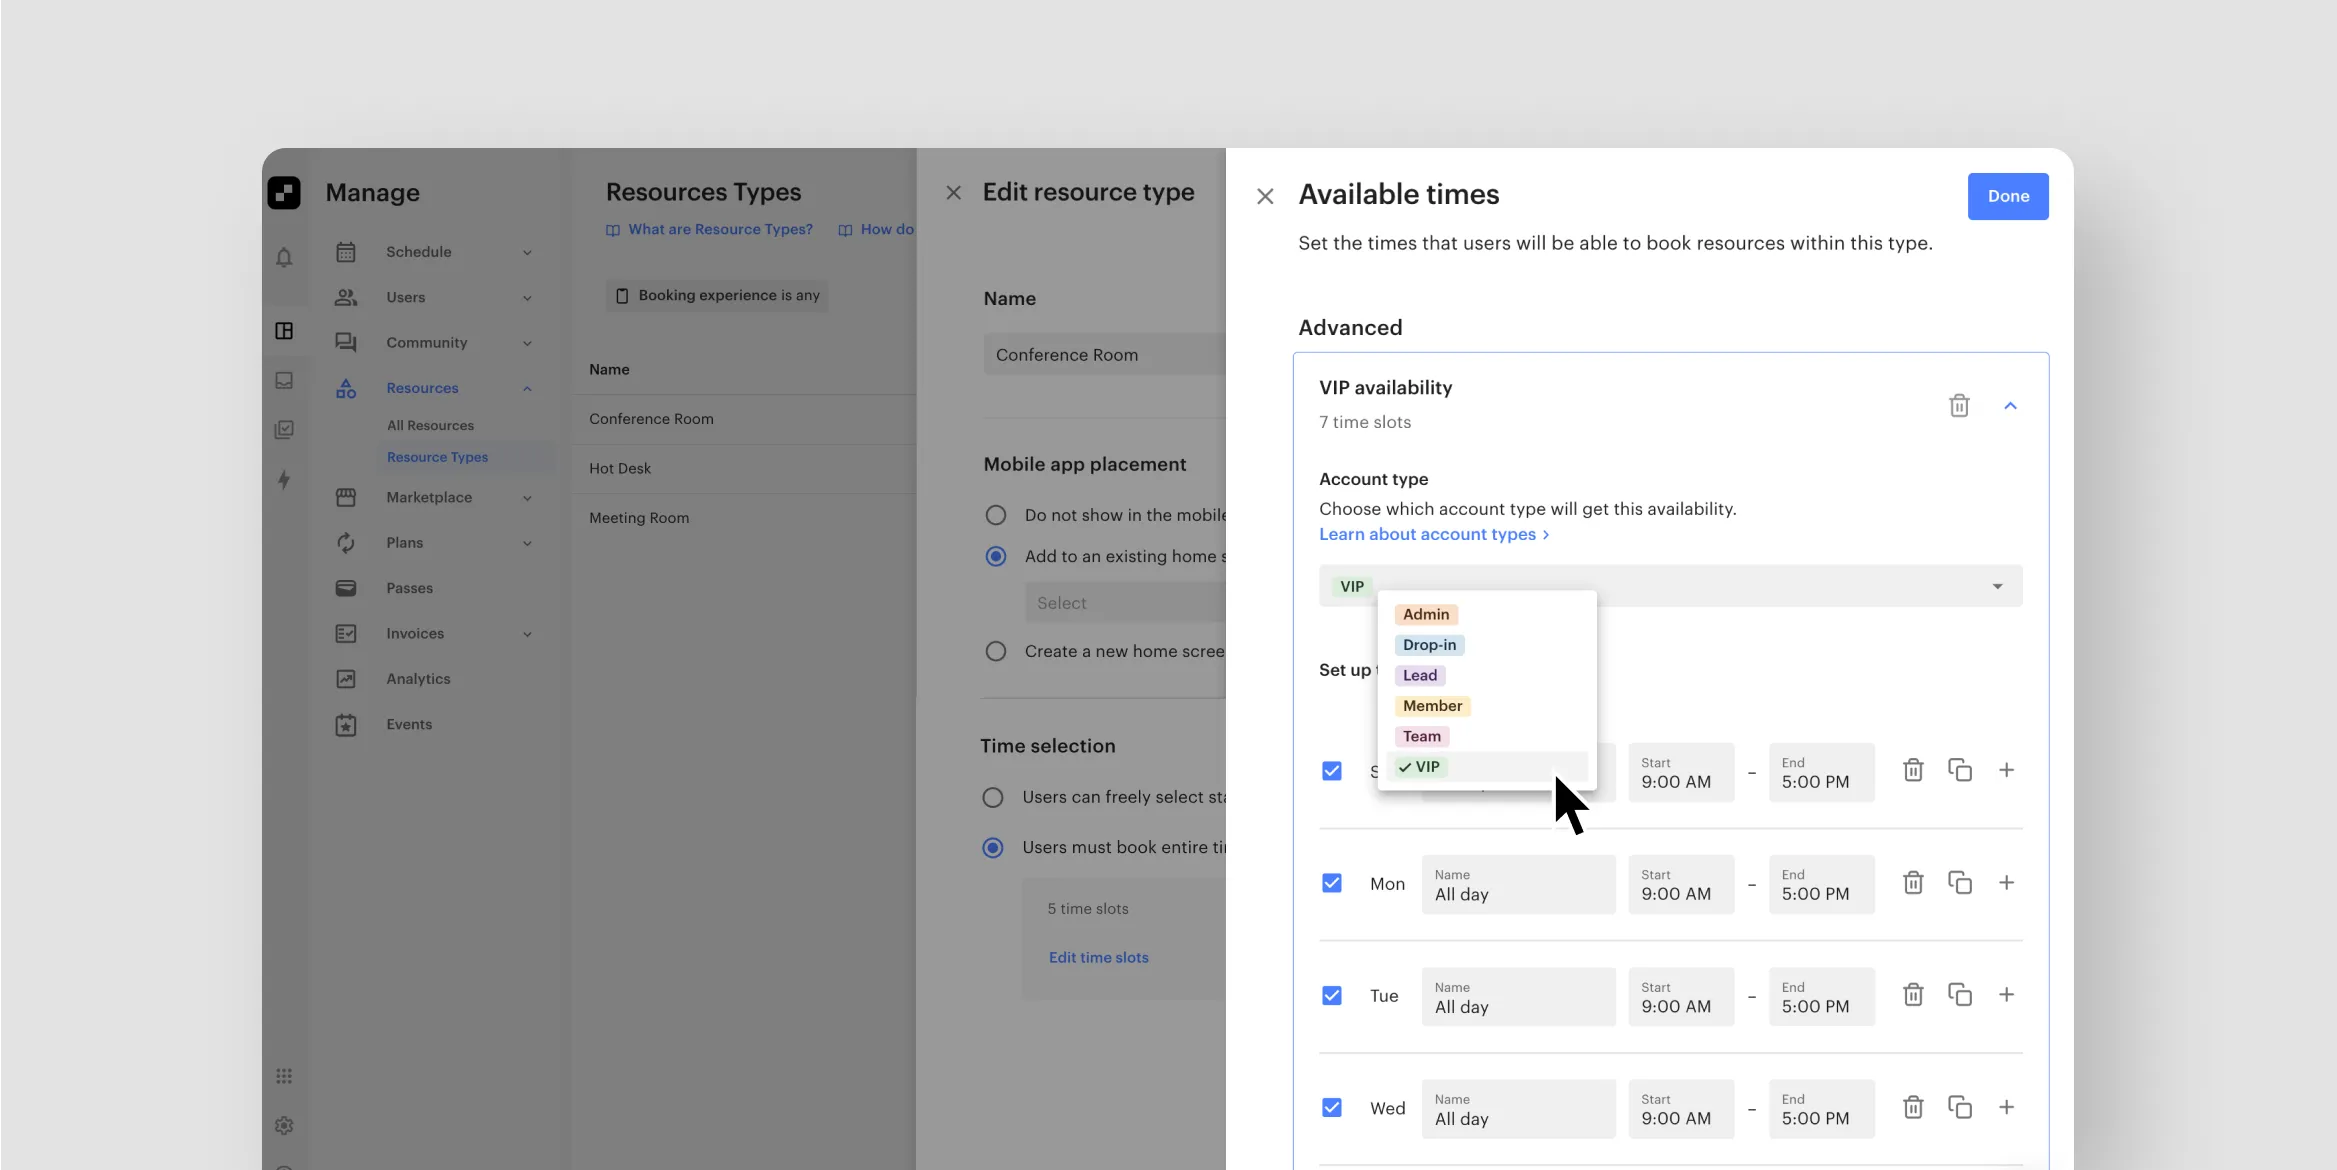
With Account Types in April came conditional resource availability, or the ability to make specific resources only available to specific users. Conditional availability opens up exciting new possibilities for your business model, space utilization, and revenue potential.
Check out this FAQ to learn more about conditional resource availability.
May: A new look and feel for your Inbox
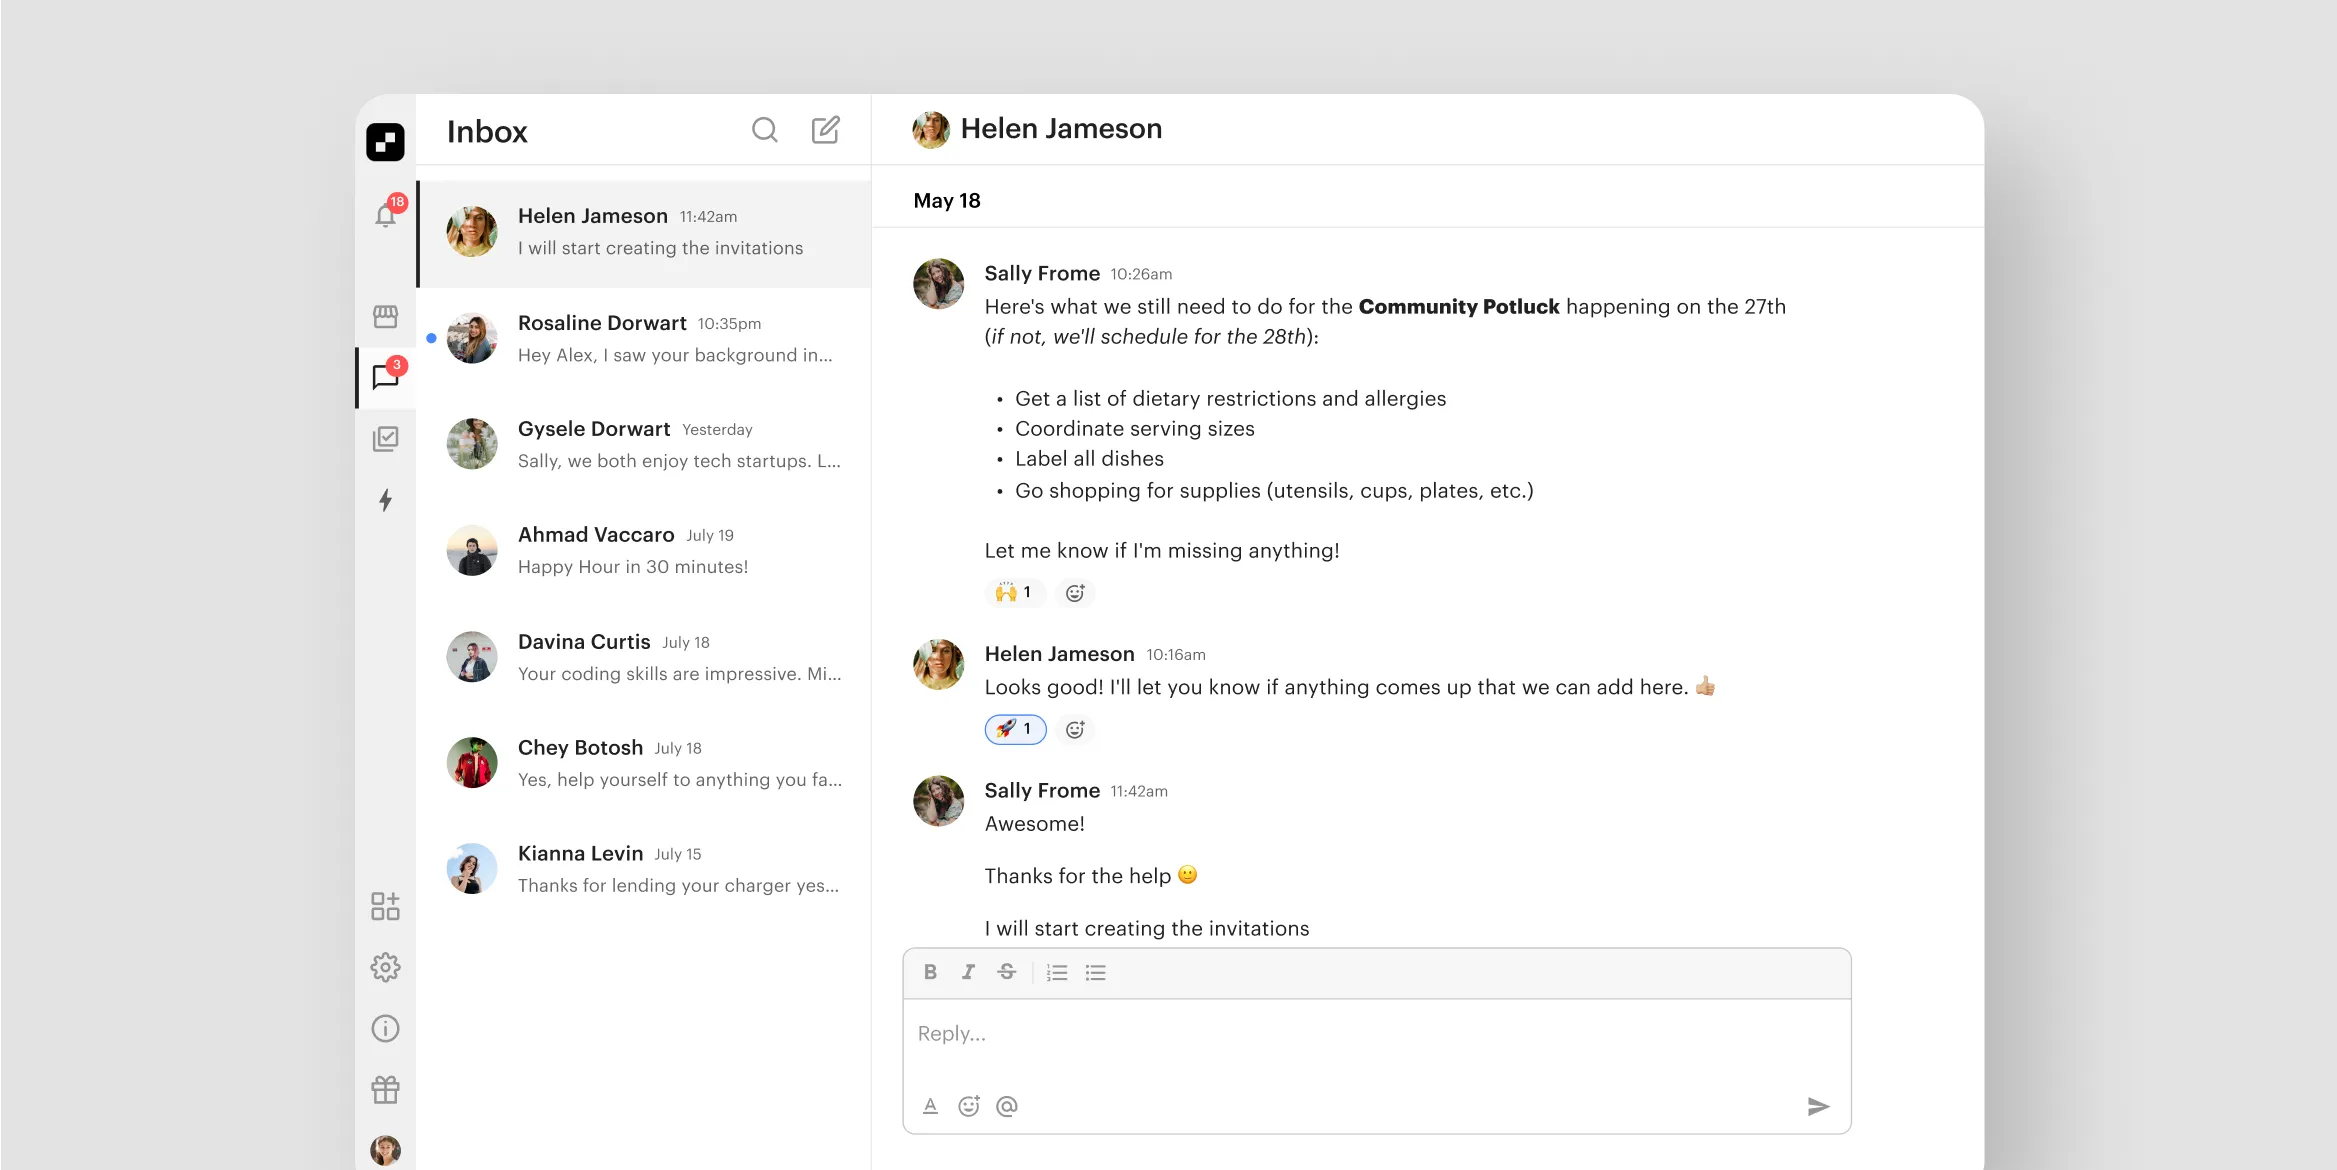
In May, we launched a brand new look and feel for your inbox. We made messaging in Optix more robust with features like text formatting (bold, italicize, highlighting, bullet points, etc.), emoji reactions to messages, hyperlinked text and URL previews, and more! It was the first of many exciting new features coming to Inbox very soon!
Check it out in your admin dashboard.
Jun: Introducing Automations
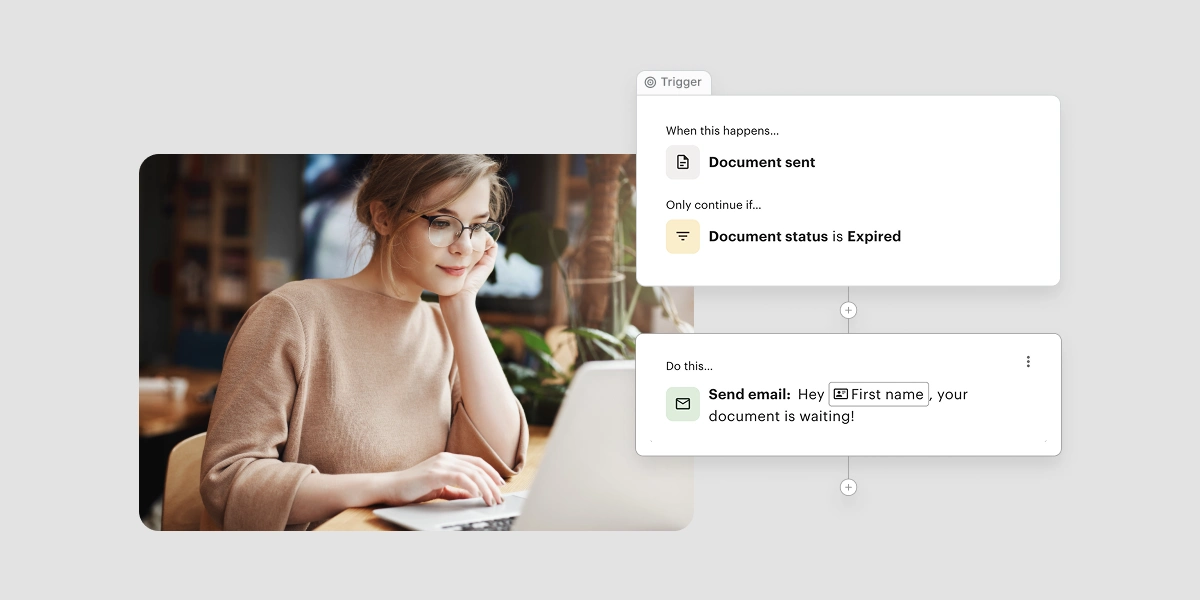
June brought with it an exciting announcement and a complete shift in how you think about Optix with Automations. Automations is designed to give you your time back and let Optix take care of the manual tasks you perform each day including email and message reminders, following up on invoices, upselling products, and more.
July: Duplicate an automation
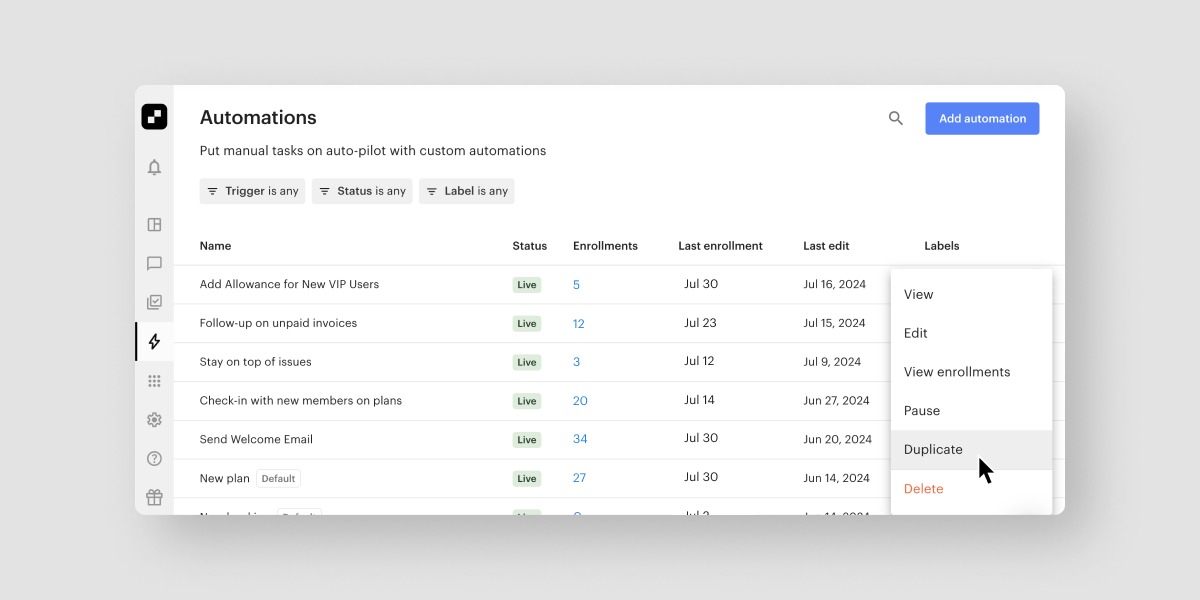
While June may have been the month we launched Automations, the work didn’t stop there. In July, we launched a number of new Automations updates including the ability to duplicate an automation. This makes it super easy to create multiple versions of the same automation for users based on their account type.
Check out this FAQ to learn how to duplicate an automation.
July: Manually enrol a user onto an automation
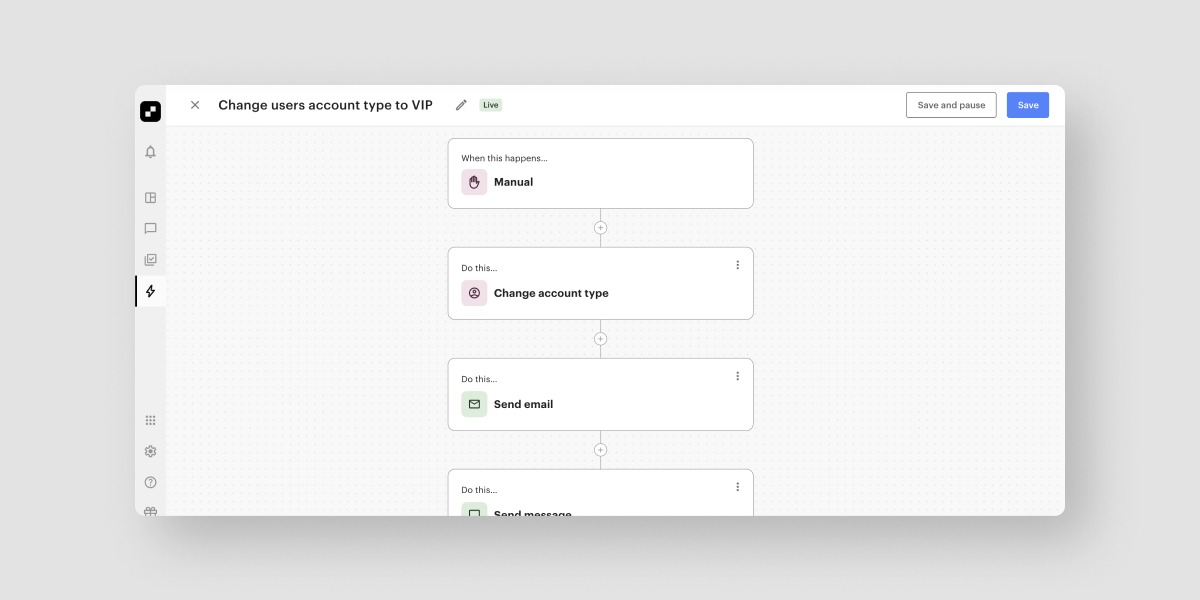
Another Automations enhancement we made in July was the ability to manually enrol a user onto an automation. This trigger allows you to put any user into an automation manually, giving your team more control over who enters which automation and, most importantly, when. This can be helpful for building out comprehensive nurture flows based on user account types.
Check out this FAQ to learn more about automation triggers
Aug: Optix now supports classes in Quickbooks
This was a big one for our Quickbooks users! In August, we updated our Optix and Quickbooks integration so that admin can now map all items in Optix to a class. This means more granular reporting and less manual work for you and your operations team each month.
Check out this FAQ to learn more about the Optix and Quickbooks integration.
Aug: Delay an automation action until a specific date
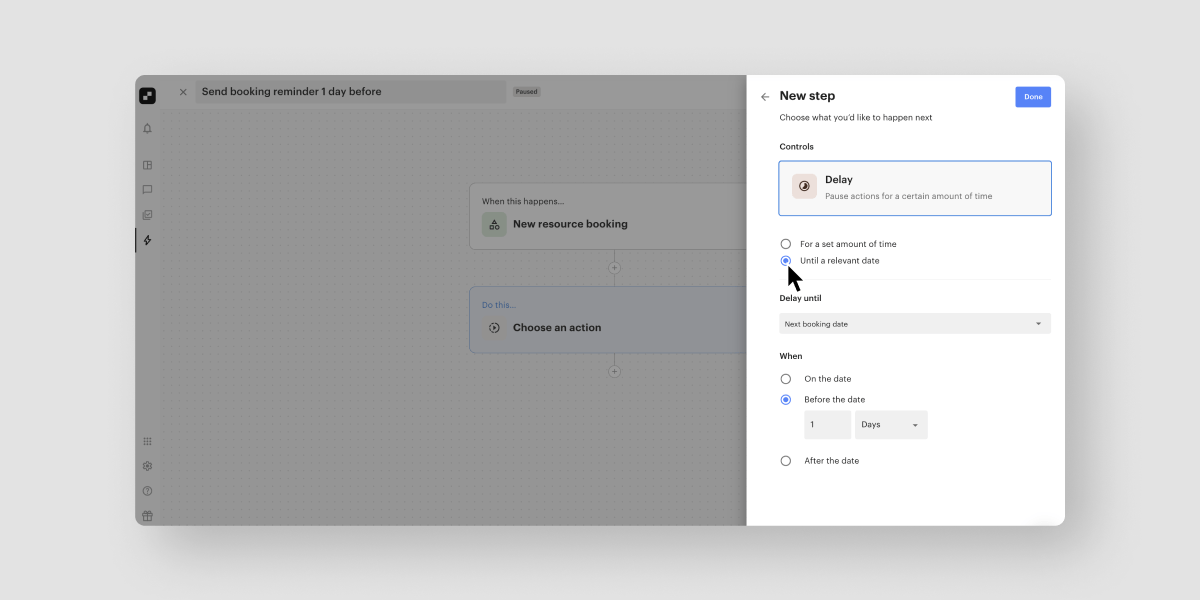
We also introduced in August the ability to delay an action until a specific date in Automations. This enables you to create a variety of automated email reminders, saving your team ample time (and headaches) from sending those out manually, like creating a custom nurture flow for anyone who books a tour to increase your tour to sign-up conversion rate.
Check out this FAQ to learn more about how to delay an action in Automations.
Sept: Select which processing fee is shown on an invoice
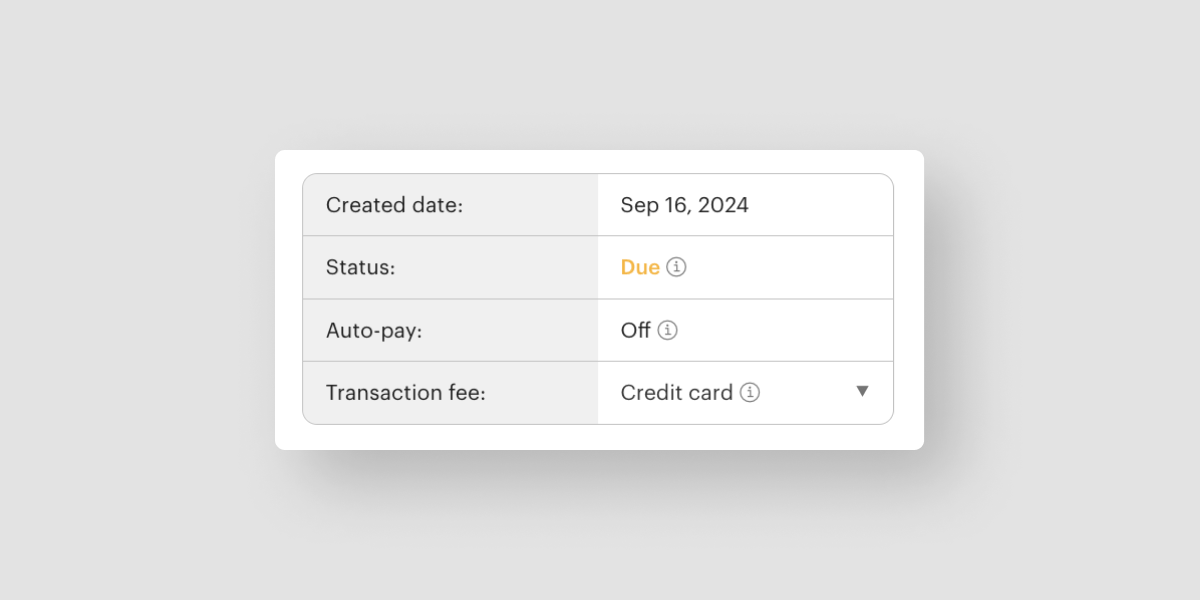
In September, we upgraded invoice reporting so that you can select which processing fee is shown on an invoice. This enhancement allows for more accurate financial reporting and helps you recover some of the revenue lost to payment processing fees.
Learn more about transaction fees in Optix →
Sept: Create an unconfirmed user when people request access to your mobile app
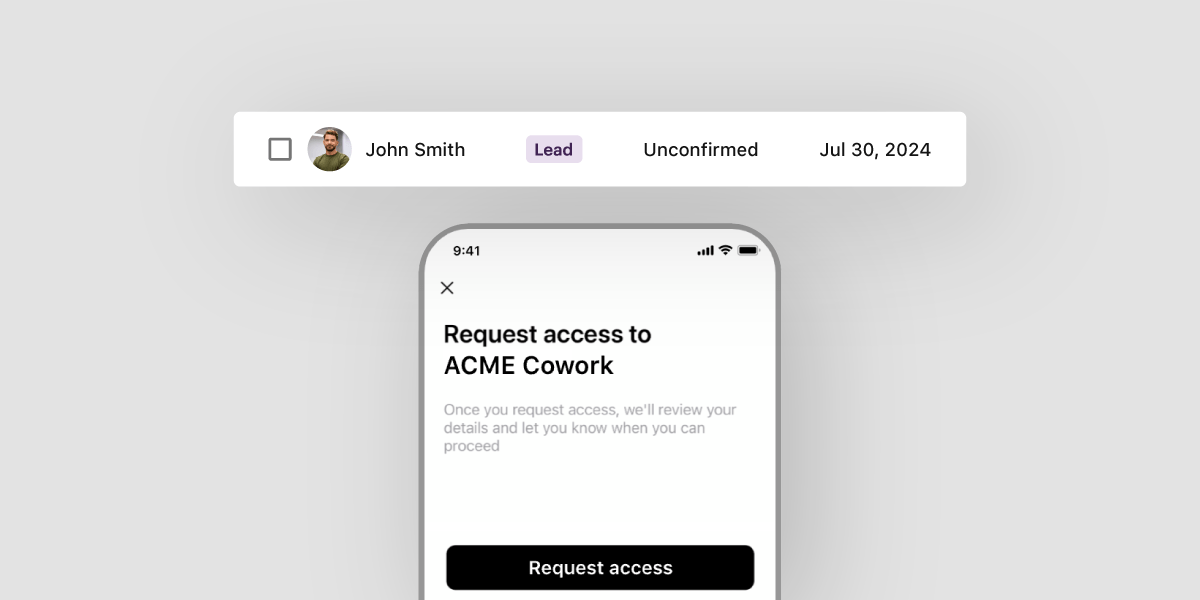
In September, we also introduced a powerful new improvement for lead capture and management through your mobile app. Now, whenever someone downloads your app and requests access, they will automatically appear in the Users panel of your dashboard as an unconfirmed user and lead. You can then use Automations to retarget these users.
Learn more about requesting access to your app.
Oct: Automatically add invoice items to users’ accounts
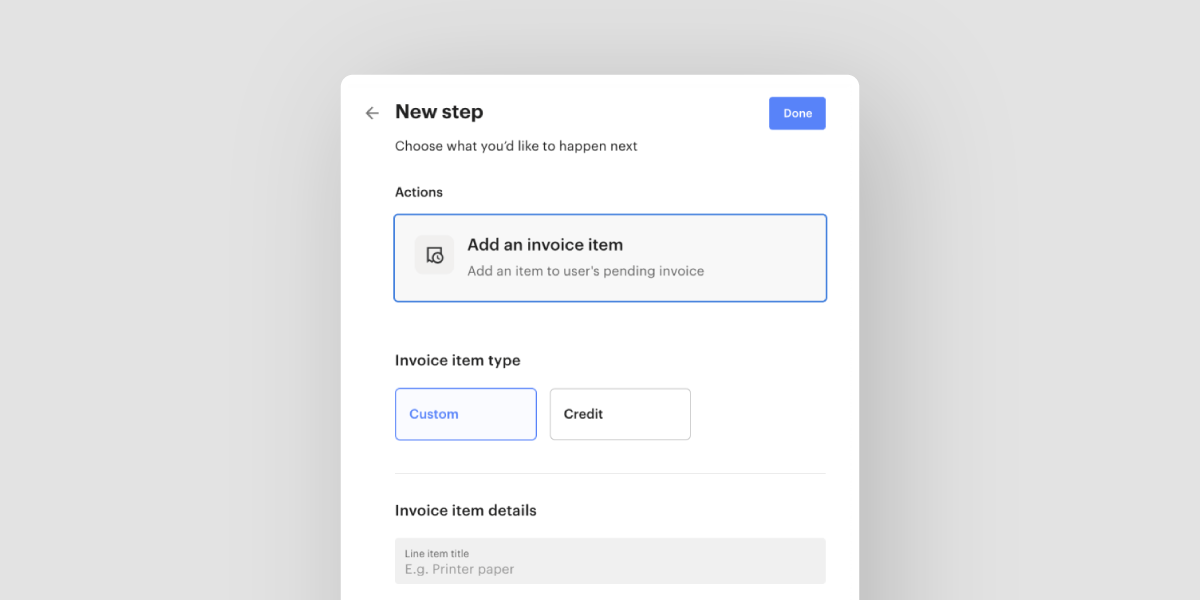
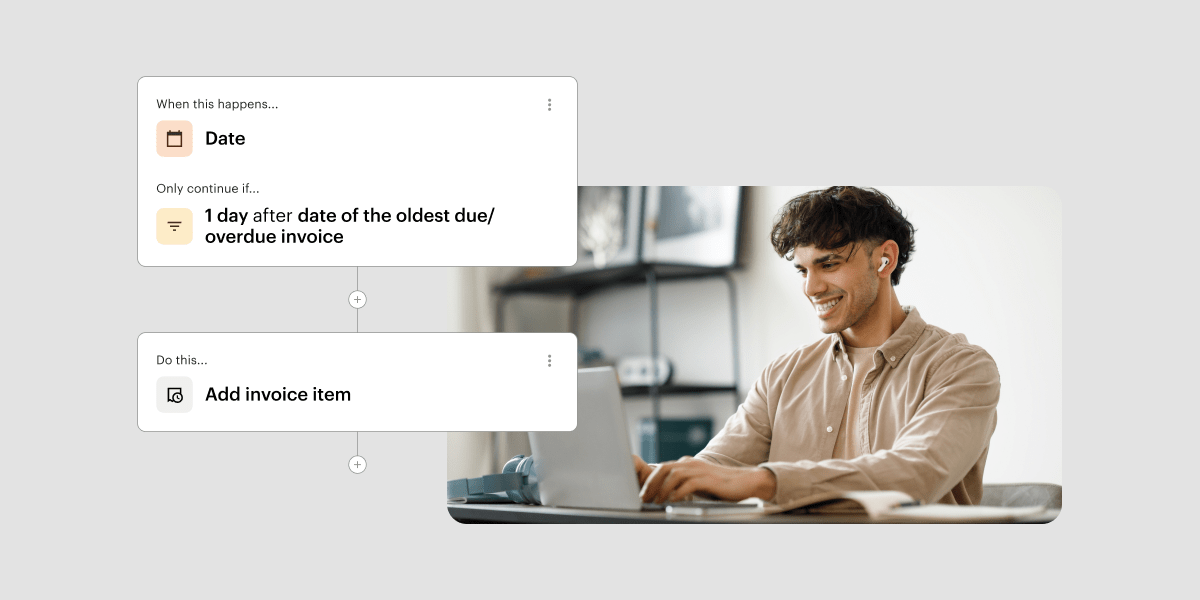
October was all about improving your Automations experience. That’s why we gave admin the ability to create automations that add invoice items to users’ accounts based on specific events. It’s super useful if you want to add a charge or credit to a user or team’s next invoice, including running some great promotions.
Learn how to put this into action via automated promotions and incentives.
Nov: Introducing the Account Panel
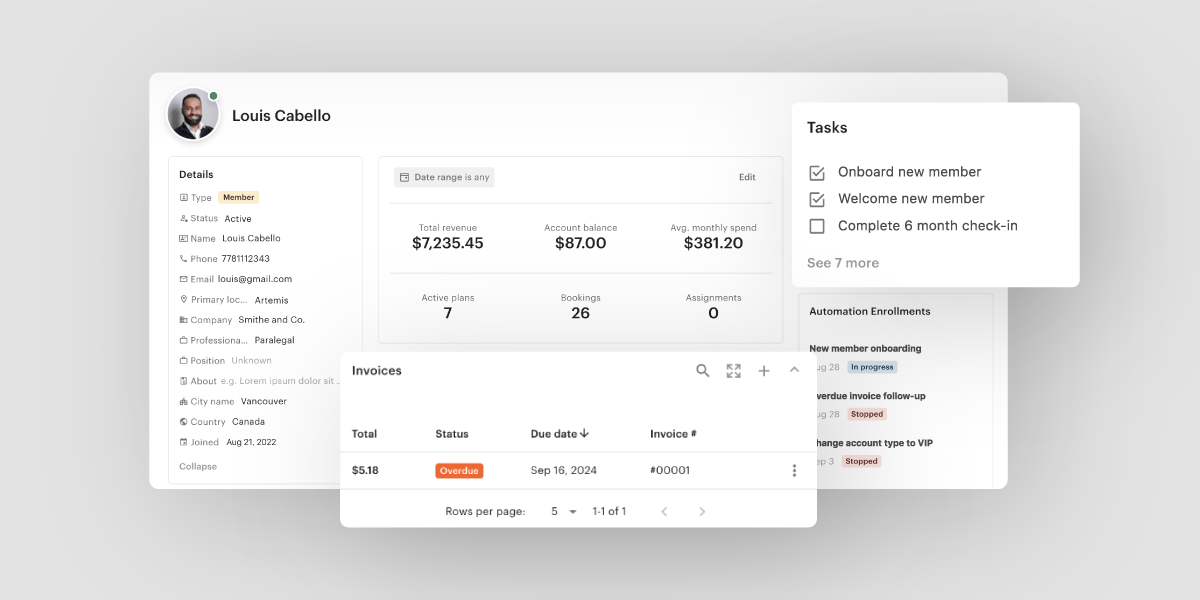
Finally, November was one of our busiest months yet as we launched a brand new user Account Panel. Here you can view user information related to invoicing, allowance, assignments, custom properties, and anything else you could dream up. You can customize what information appears at the top of the panel so you can quickly get the information you need.
Learn more about the all new Account Panel.
Nov: Send Optix automated emails from a domain of your choosing
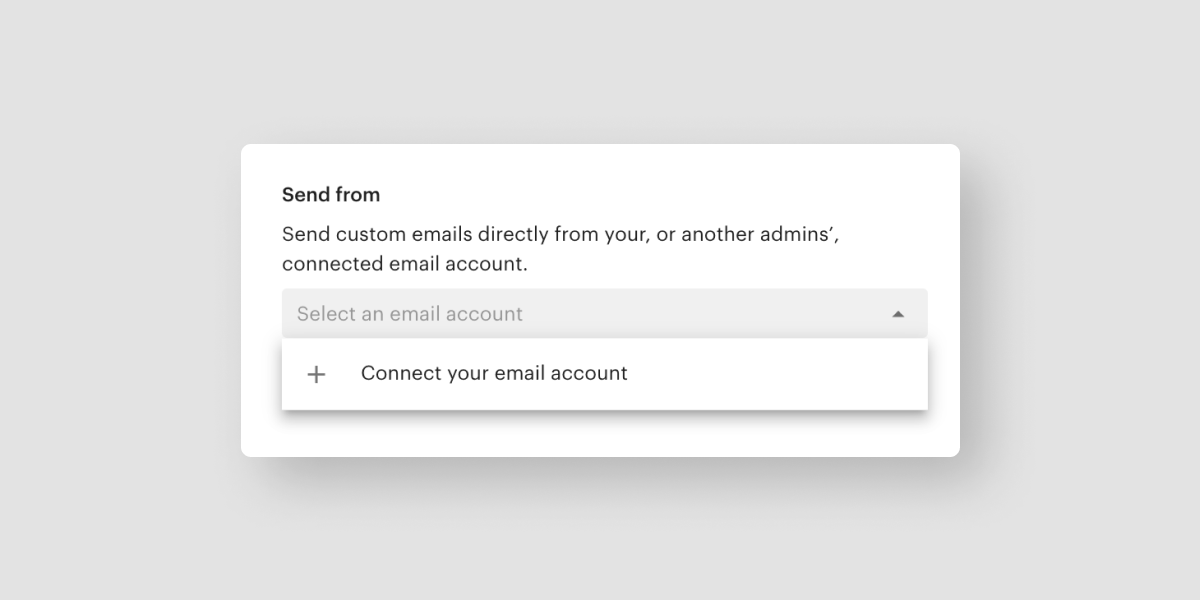
The Account Panel wasn’t the only heavy hitter we released in November. We also made it so you can send Optix automated emails from a domain of your choosing. From now on, emails you include in your automations will be sent from your own domain instead of the optixapp domain. That means, if you send an automated welcome email to all new members, that email will now come from you instead of Optix.
Learn how to connect your email account to Optix.
Thank you to our clients for all of the support and appreciation over the last year. It has been an unforgettable 2024, and we can’t wait to see what 2025 has in store for the coworking and flex space industry!

